
Can Shower-Enclosure Components Be Screwed Directly into a Shower Tray?
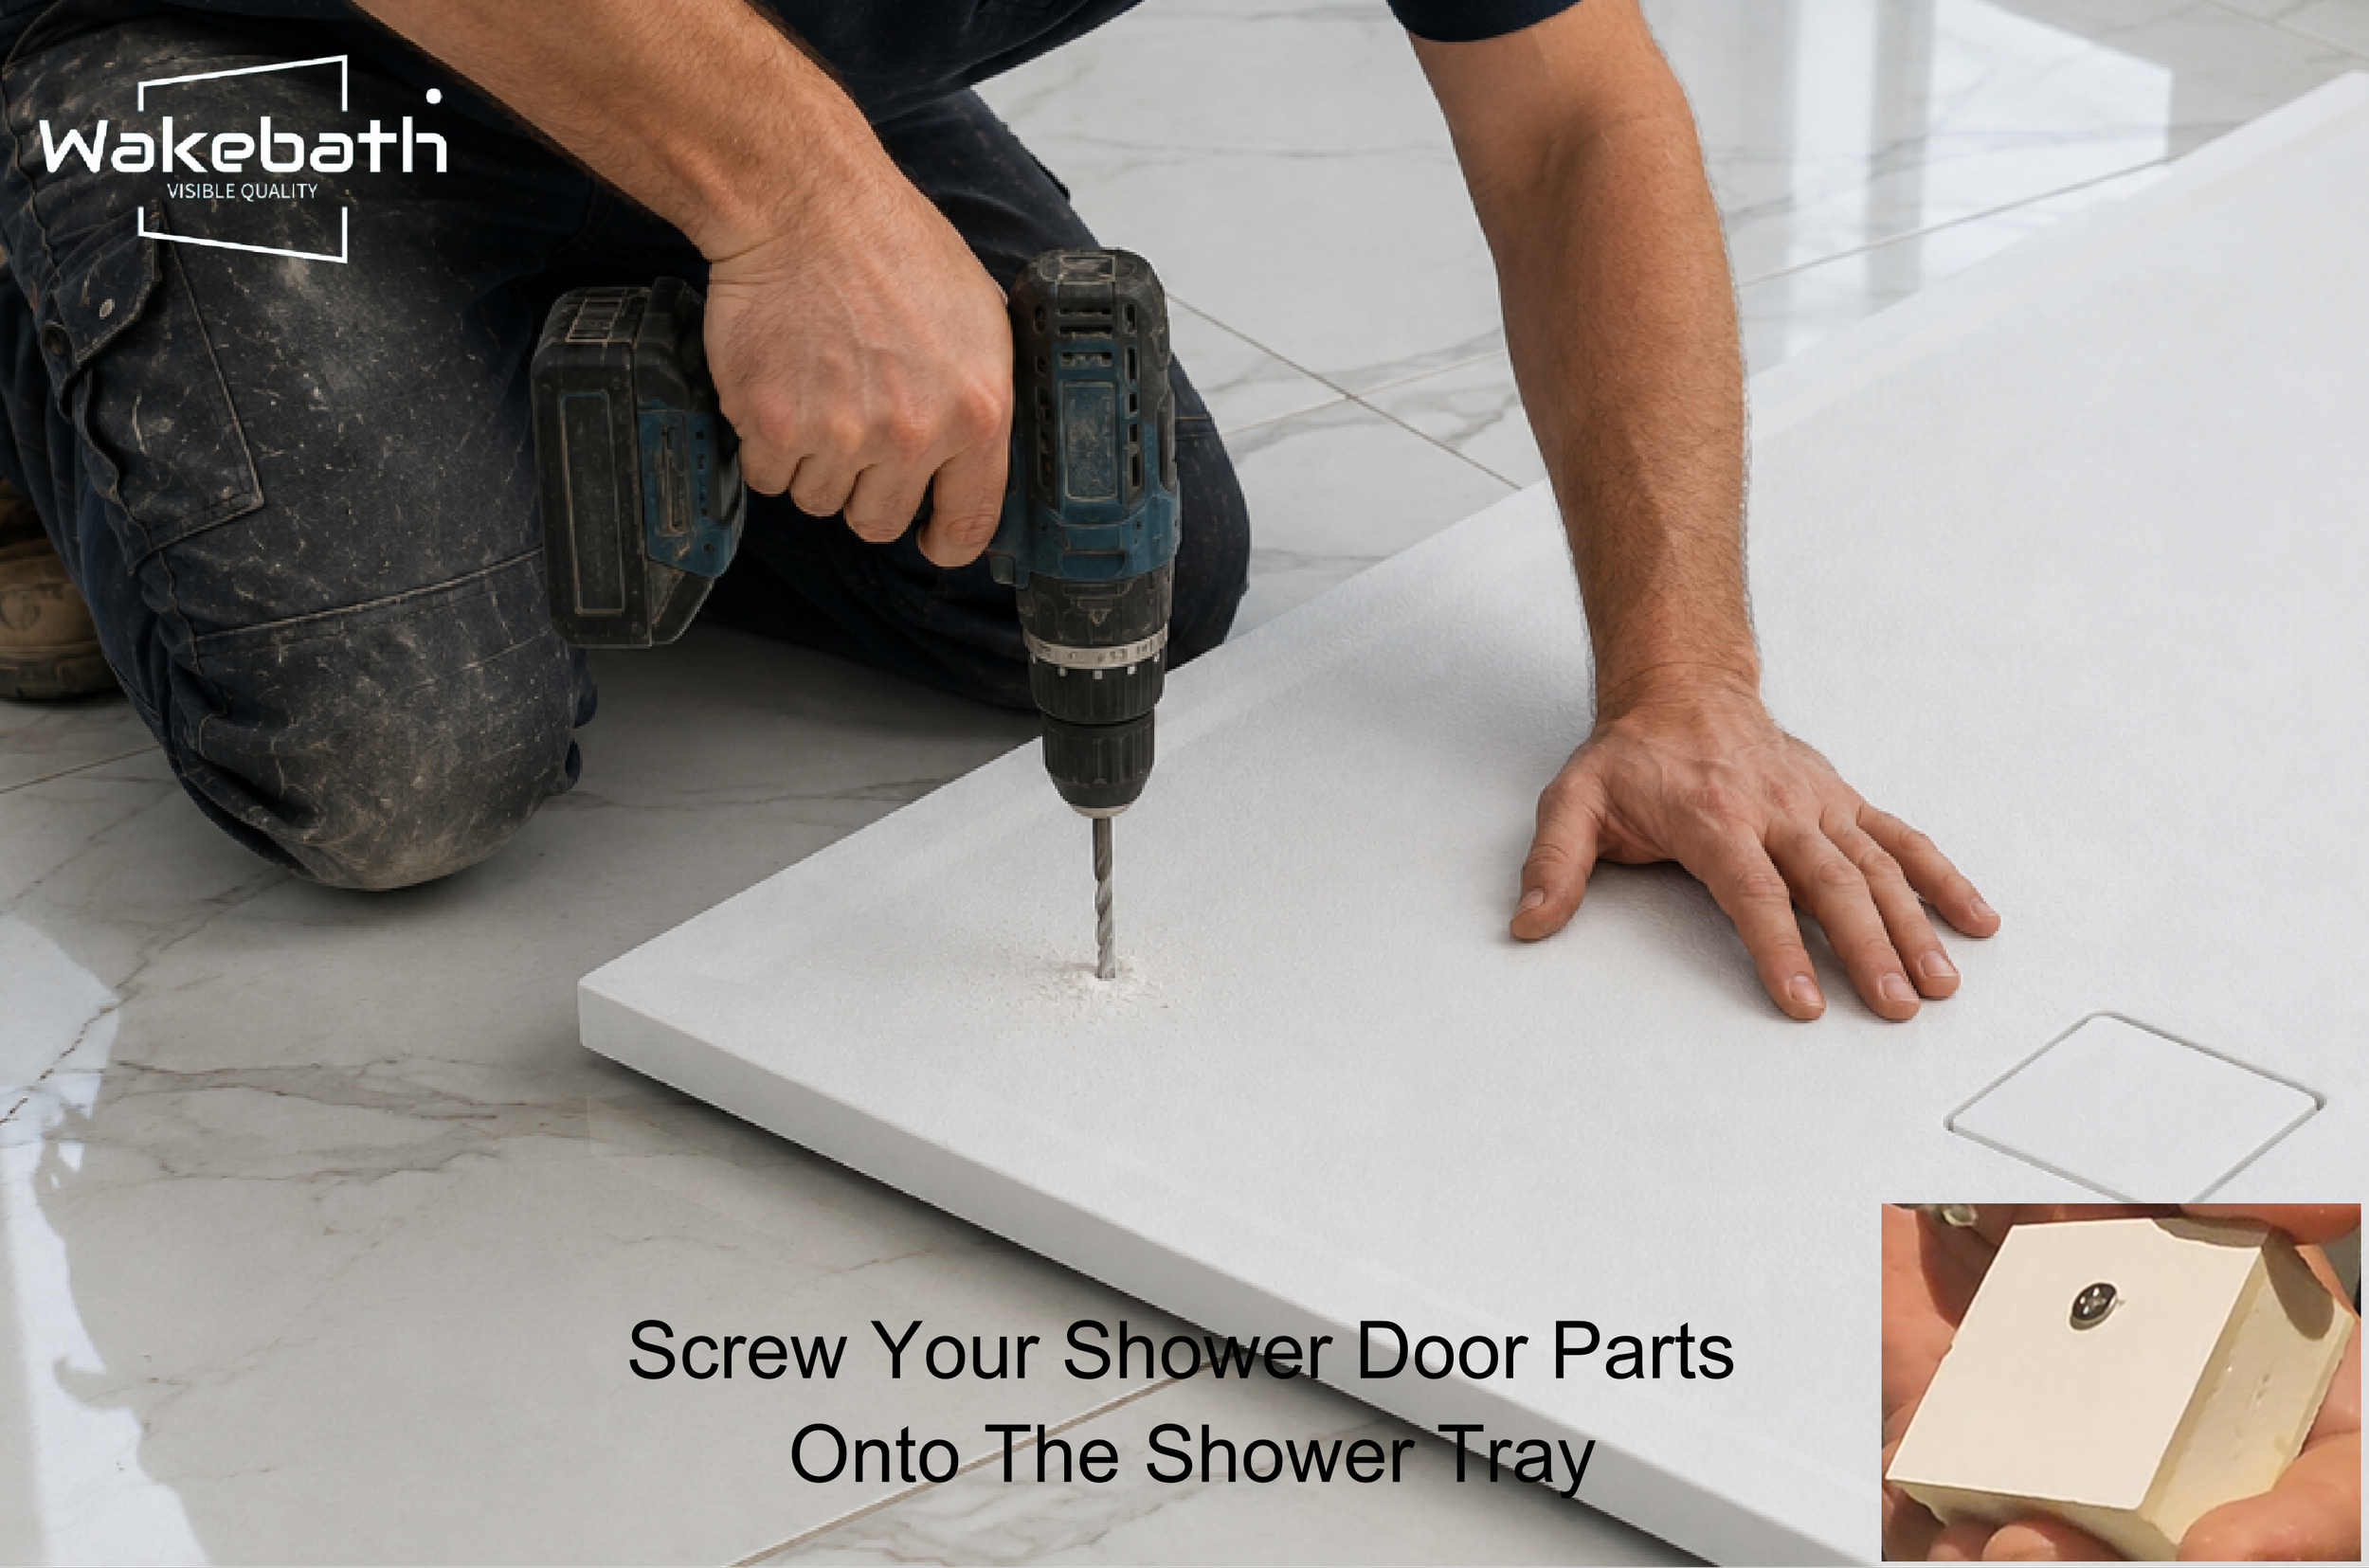
In the right composite construction and with an approved fixing method, compatible self-tapping screws can be used for selected shower-enclosure profiles, guide blocks and other light components. The application must still be checked against the exact tray, fixing location and hardware.
This capability can be valuable because a shower tray does not work in isolation. Once installed, it has to coordinate with the waste, waterproofing, enclosure profile, door system and installer method. A tray may be the correct size and colour but still create problems if the enclosure hardware cannot be fixed as intended.
Why tray-level fixing matters
Some shower-enclosure designs include a lower profile, guide block or other small component close to the tray surface. If the component needs mechanical fixing, the installer must have a safe and repeatable fixing route.
When the tray has not been designed or approved for that interface, the installer may need to:
- move the fixing point;
- change the enclosure hardware;
- add a separate support or reinforcement;
- rely on a different fixing method;
- stop the installation and request technical advice.
These adjustments can increase installation time and create avoidable service enquiries for the enclosure or tray supplier.
“Drillable” and “screw-fixable” are not the same thing
A surface may be capable of being drilled without providing reliable screw engagement. The screw must interact with a suitable part of the tray construction, and the surrounding material must remain stable during installation and use.
Material names alone are not enough to answer the question. Mineral-filled, stone-resin, slab, acrylic, GRP and lightweight composite trays can behave differently when drilled. Product geometry, reinforcement, local thickness, edge distance and the manufacturer's approved method all matter.
For that reason, buyers should not assume that every tray can accept a screw—or that every drillable tray can carry the same fitting.
How the Wakebath composite construction creates another fixing option
The Wakebath tray uses a textured gelcoat surface, resin-and-fibreglass reinforcement above and below a perforated polyurethane-foam core. In a suitable application area, this composite build can provide direct engagement for a compatible self-tapping screw.
Potential applications include selected:
- lower enclosure profiles;
- door guide blocks;
- light trims or covers;
- non-safety-critical locating components;
- customer-specific accessories approved during product development.
The main buyer benefit is better coordination between the tray and enclosure system. Instead of discovering a compatibility problem during installation, the interface can be reviewed using the actual component before the range is approved.
What must be confirmed before installation?
A professional fixing instruction should define at least seven points:
- Fixing location — the permitted area and the required distance from edges, the waste opening and changes in slope.
- Screw specification — material, diameter, length, thread form and head type.
- Pilot hole — whether one is required and, if so, its diameter and depth.
- Penetration depth — enough for engagement without damaging another part of the tray construction.
- Installation torque — sufficient to secure the component without stripping the fixing point or damaging the surface.
- Sealing method — the approved sealant and application sequence for a wet-area penetration.
- Component and load — the exact profile, guide block or accessory for which the method has been approved.
Hardware that supports glass, carries body weight or performs another safety-critical function must not be approved from a simple screw demonstration. It requires a separate engineering and test review.
What does the current demonstration prove?
Wakebath has recorded a self-tapping screw being driven into a cut composite tray sample. The screw remains engaged during a manual pull with pliers.
The demonstration confirms that direct screw engagement is possible in the sample shown. It does not create a universal pull-out rating or prove performance under shear, repeated door movement, long-term wet conditioning or an unsealed water penetration.
For a customer application, the recommended next step is to test the production tray together with the intended enclosure component and document the approved fixing process.
A practical approval route for enclosure brands
For a UK enclosure brand, importer or private-label supplier, the process can be kept simple:
- Send the component drawing, physical sample or 3D file.
- Identify the intended tray model and fixing position.
- Agree the proposed screw, pilot-hole and sealing method.
- Fit the real component to a production-representative tray sample.
- Define any required pull-out, shear, cyclic or wet-conditioning tests.
- Approve the final fixing instruction and warranty boundary before launch.
This approach turns an interesting material feature into a repeatable installation method.
Reducing compatibility and after-sales risk
The strongest commercial benefit is not a headline load number. It is the ability to review the tray and enclosure as one system.
For buyers, that may provide:
- a wider choice of compatible enclosure layouts;
- fewer last-minute hardware changes;
- clearer instructions for installers;
- fewer installation-related customer enquiries;
- a better-defined responsibility boundary between tray and enclosure suppliers.
Review your enclosure interface with Wakebath
If a profile, guide block or other enclosure component needs to be fixed at tray level, send us the hardware drawing and intended tray size. We can review the concept, identify the information still required and prepare an application-specific sample proposal.
Include the component drawing, fixing position, expected load and intended shower-tray model.
Buyer FAQ
Can a self-tapping screw be used anywhere on the shower tray?
No. The fixing location must be approved for the exact tray model and component. Edge distance, waste position, slope changes and local construction must be considered.
Is a pilot hole required?
That depends on the screw and the approved installation method. The pilot-hole diameter and depth, or a documented no-pilot-hole method, should be defined before installation.
Does drilling the tray require sealing?
Any penetration in a wet area needs an approved sealing method. The sealant, application sequence and cure time should form part of the fixing instruction.
Can the tray support hinges or safety-critical glass fittings?
Not on the basis of the current screw-engagement demonstration. Safety-critical hardware and significant loads require separate engineering approval and appropriate testing.
Does the video show the maximum fixing load?
No. It is a qualitative engagement demonstration, not a calibrated pull-out, shear, cyclic-load or waterproofing test.
Send Us Your Profile or Guide BlockIn the right composite construction and with an approved fixing method, compatible self-tapping screws can be used for selected shower-enclosure profiles, guide blocks and other light components. The application must still be checked against the exact tray, fixing location and hardware.
This capability can be valuable because a shower tray does not work in isolation. Once installed, it has to coordinate with the waste, waterproofing, enclosure profile, door system and installer method. A tray may be the correct size and colour but still create problems if the enclosure hardware cannot be fixed as intended.
Why tray-level fixing matters
Some shower-enclosure designs include a lower profile, guide block or other small component close to the tray surface. If the component needs mechanical fixing, the installer must have a safe and repeatable fixing route.
When the tray has not been designed or approved for that interface, the installer may need to:
- move the fixing point;
- change the enclosure hardware;
- add a separate support or reinforcement;
- rely on a different fixing method;
- stop the installation and request technical advice.
These adjustments can increase installation time and create avoidable service enquiries for the enclosure or tray supplier.
“Drillable” and “screw-fixable” are not the same thing
A surface may be capable of being drilled without providing reliable screw engagement. The screw must interact with a suitable part of the tray construction, and the surrounding material must remain stable during installation and use.
Material names alone are not enough to answer the question. Mineral-filled, stone-resin, slab, acrylic, GRP and lightweight composite trays can behave differently when drilled. Product geometry, reinforcement, local thickness, edge distance and the manufacturer's approved method all matter.
For that reason, buyers should not assume that every tray can accept a screw—or that every drillable tray can carry the same fitting.
How the Wakebath composite construction creates another fixing option
The Wakebath tray uses a textured gelcoat surface, resin-and-fibreglass reinforcement above and below a perforated polyurethane-foam core. In a suitable application area, this composite build can provide direct engagement for a compatible self-tapping screw.
Potential applications include selected:
- lower enclosure profiles;
- door guide blocks;
- light trims or covers;
- non-safety-critical locating components;
- customer-specific accessories approved during product development.
The main buyer benefit is better coordination between the tray and enclosure system. Instead of discovering a compatibility problem during installation, the interface can be reviewed using the actual component before the range is approved.
What must be confirmed before installation?
A professional fixing instruction should define at least seven points:
1. Fixing location — the permitted area and the required distance from edges, the waste opening and changes in slope.
2. Screw specification — material, diameter, length, thread form and head type.
3. Pilot hole — whether one is required and, if so, its diameter and depth.
4. Penetration depth — enough for engagement without damaging another part of the tray construction.
5. Installation torque — sufficient to secure the component without stripping the fixing point or damaging the surface.
6. Sealing method — the approved sealant and application sequence for a wet-area penetration.
7. Component and load — the exact profile, guide block or accessory for which the method has been approved.
Hardware that supports glass, carries body weight or performs another safety-critical function must not be approved from a simple screw demonstration. It requires a separate engineering and test review.
What does the current demonstration prove?
Wakebath has recorded a self-tapping screw being driven into a cut composite tray sample. The screw remains engaged during a manual pull with pliers.
The demonstration confirms that direct screw engagement is possible in the sample shown. It does not create a universal pull-out rating or prove performance under shear, repeated door movement, long-term wet conditioning or an unsealed water penetration.
For a customer application, the recommended next step is to test the production tray together with the intended enclosure component and document the approved fixing process.
A practical approval route for enclosure brands
For a UK enclosure brand, importer or private-label supplier, the process can be kept simple:
1. Send the component drawing, physical sample or 3D file.
2. Identify the intended tray model and fixing position.
3. Agree the proposed screw, pilot-hole and sealing method.
4. Fit the real component to a production-representative tray sample.
5. Define any required pull-out, shear, cyclic or wet-conditioning tests.
6. Approve the final fixing instruction and warranty boundary before launch.
This approach turns an interesting material feature into a repeatable installation method.
Reducing compatibility and after-sales risk
The strongest commercial benefit is not a headline load number. It is the ability to review the tray and enclosure as one system.
For buyers, that may provide:
- a wider choice of compatible enclosure layouts;
- fewer last-minute hardware changes;
- clearer instructions for installers;
- fewer installation-related customer enquiries;
- a better-defined responsibility boundary between tray and enclosure suppliers.
Review your enclosure interface with Wakebath
If a profile, guide block or other enclosure component needs to be fixed at tray level, send us the hardware drawing and intended tray size. We can review the concept, identify the information still required and prepare an application-specific sample proposal.
Buyer FAQ
Can a self-tapping screw be used anywhere on the shower tray?
No. The fixing location must be approved for the exact tray model and component. Edge distance, waste position, slope changes and local construction must be considered.
Is a pilot hole required?
That depends on the screw and the approved installation method. The pilot-hole diameter and depth, or a documented no-pilot-hole method, should be defined before installation.
Does drilling the tray require sealing?
Any penetration in a wet area needs an approved sealing method. The sealant, application sequence and cure time should form part of the fixing instruction.
Can the tray support hinges or safety-critical glass fittings?
Not on the basis of the current screw-engagement demonstration. Safety-critical hardware and significant loads require separate engineering approval and appropriate testing.
Does the video show the maximum fixing load?
No. It is a qualitative engagement demonstration, not a calibrated pull-out, shear, cyclic-load or waterproofing test.
Email contact@wakebath.com or WhatsApp +86 139 2547 4190 to send the component drawing, fixing position, expected load and intended shower-tray model.